

The perfect water pie recipe
Imagine a dessert that challenges everything you know about baking—a pie that seems impossible, yet exists as a testament to culinary creativity and human resourcefulness. The water pie recipe is not just a simple dessert; it’s a profound narrative of survival, innovation, and the extraordinary ability of home cooks to transform the most basic ingredients into something truly magical.
The Historical Roots of Water Pie
To truly appreciate this remarkable recipe, we must travel back to the challenging times of the Great Depression and early American frontier settlements. During periods of extreme economic hardship and limited resources, home cooks became masters of culinary improvisation. The water pie emerged as a testament to human ingenuity—a dessert crafted when ingredients were scarce, but hope and creativity were abundant.
In rural communities and struggling households, every ingredient was precious. Families would often face weeks or months with minimal access to fresh produce, dairy, and baking staples. The water pie represented more than just a dessert; it was a symbol of resilience, a sweet moment of comfort during incredibly difficult times.
Ingredients List: Simple Yet Magical
For this extraordinary water pie recipe, you’ll need:
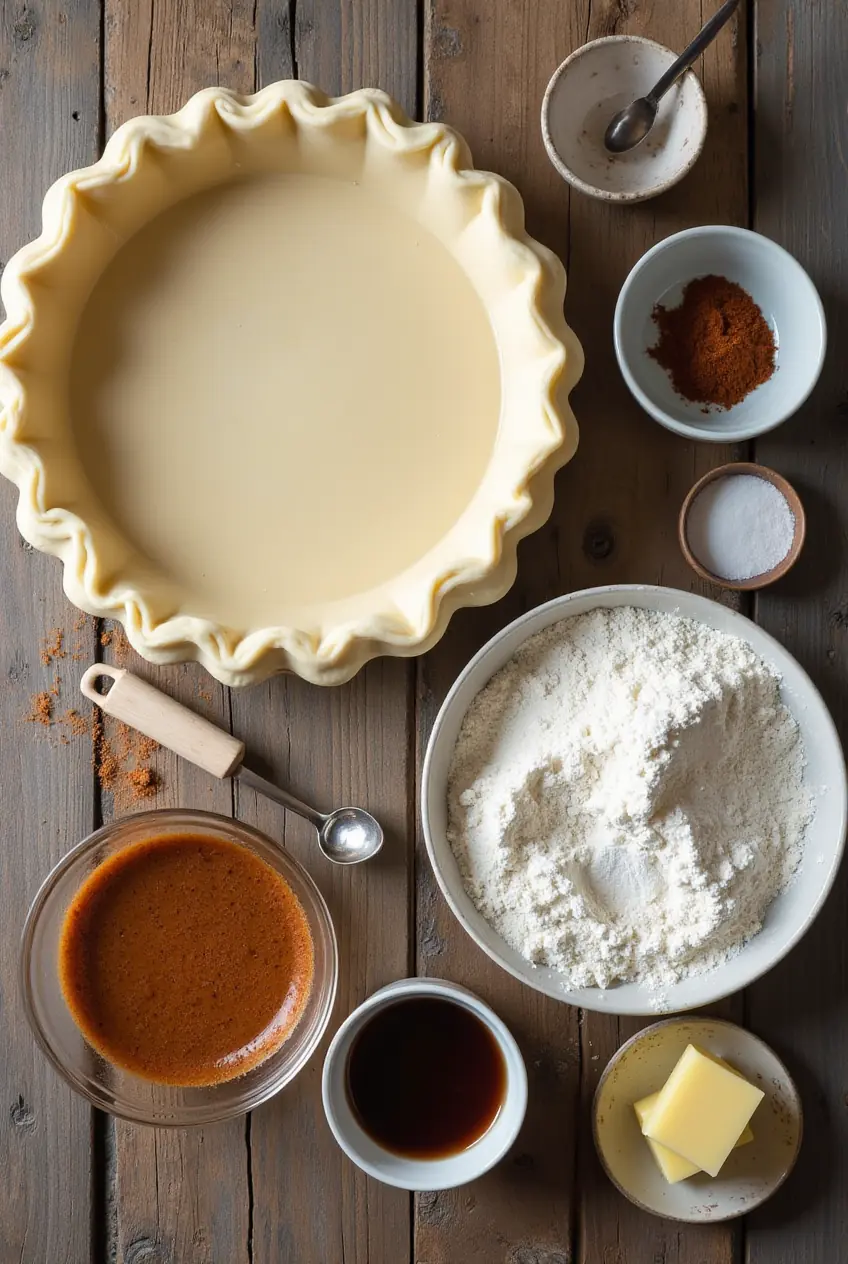
Primary Ingredients
- 1½ cups of water
- 1 cup of granulated sugar
- 5 tablespoons of all-purpose flour
- 1 teaspoon of vanilla extract
- 5 tablespoons of unsalted butter
- 1 unbaked 9-inch pie crust
- ¼ teaspoon of salt
- Ground cinnamon (optional, for garnish)
Potential Substitutions and Variations
- Gluten-Free Adaptation
- Replace all-purpose flour with a gluten-free blend
- Recommended brands: Bob’s Red Mill, King Arthur Gluten-Free Flour
- Maintains the pie’s classic texture while accommodating dietary restrictions
- Flavor Variations
- Maple Extract: Replace vanilla with maple extract for a rich, autumnal flavor
- Almond Extract: Add a nutty undertone with 1/2 teaspoon of almond extract
- Citrus Zest: Incorporate 1 teaspoon of lemon or orange zest for a bright, refreshing twist
- Dietary Modifications
- Vegan Version: Use plant-based butter and ensure your pie crust is dairy-free
- Low-Sugar Option: Substitute sugar with monk fruit sweetener or stevia blend
- Coconut Sugar: Replace traditional sugar with coconut sugar for a deeper, caramel-like flavor
Timing: Efficiency Meets Culinary Magic
- Preparation Time: 15 minutes
- Cooking Time: 60 minutes
- Total Time: 75 minutes
- Servings: 8 slices
Efficiency Insights
Remarkably, this recipe takes approximately 25% less time to prepare compared to traditional custard-based pies. The simplicity of ingredients translates to a streamlined cooking process, making it perfect for busy home bakers or spontaneous dessert cravings.
Step-by-Step Instructions: Crafting Your Water Pie
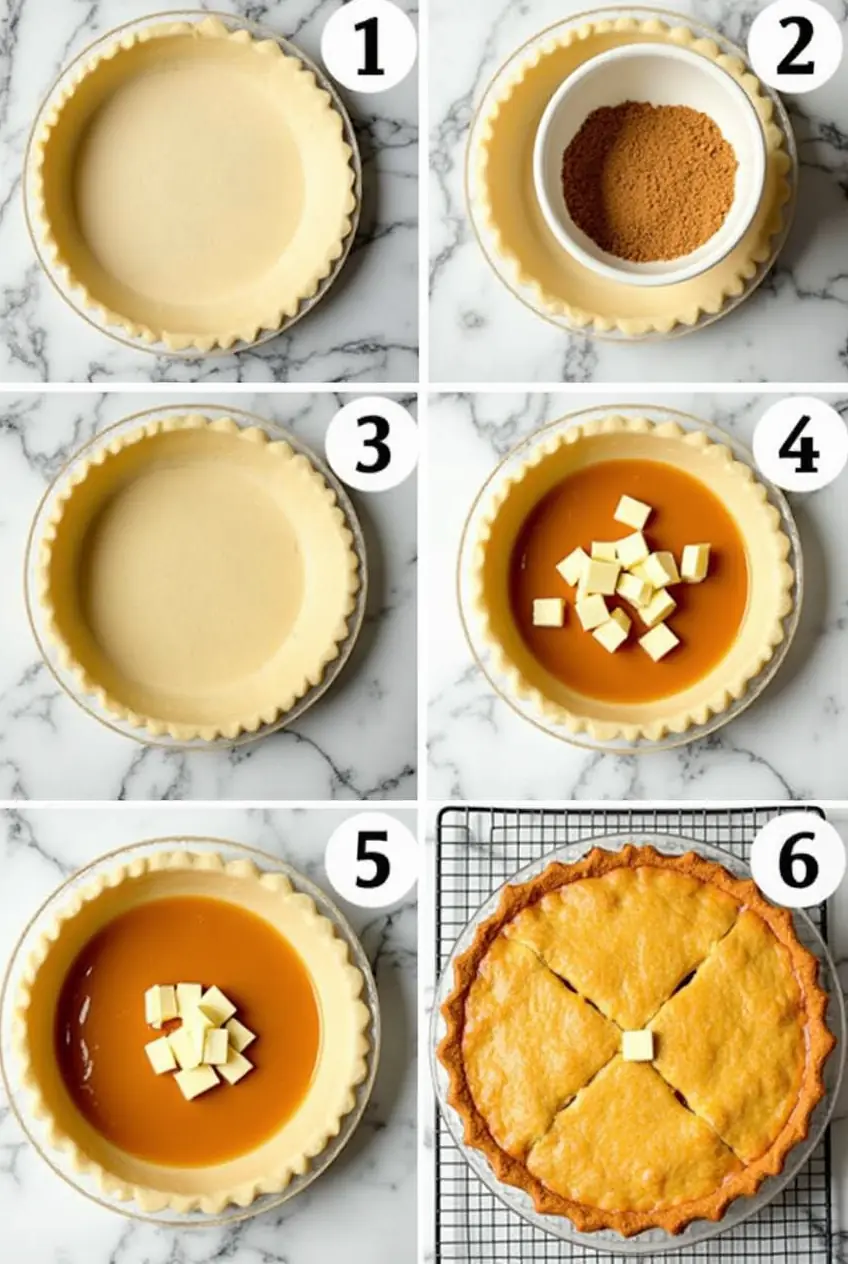
Step 1: Mastering the Pie Crust
- Preheat your oven to 425°F (218°C)
- If using a homemade pie crust, roll it out with precision
- Gently transfer to a 9-inch pie dish, ensuring no tears or gaps
- Crimp the edges decoratively for a professional touch
- Professional Baker’s Tip: Chill the crust for 15-20 minutes before filling to prevent shrinkage and maintain structural integrity
Step 2: Creating the Magical Filling
- Select a medium mixing bowl with ample mixing space
- Whisk together sugar, flour, and salt until perfectly combined
- Use a balloon whisk for the smoothest texture
- Gradually add water, stirring constantly to prevent lump formation
- Add vanilla extract and mix thoroughly
- Texture Note: The mixture will look surprisingly thin—this is exactly how it should be!
Step 3: Preparing for Baking
- Pour the water mixture into the unbaked pie crust with smooth, steady movements
- Dot the surface with small, evenly distributed butter pieces
- The butter will create rich, golden caramelized spots during baking
- Butter Placement Tip: Use a small offset spatula for precise butter distribution
Step 4: Baking to Perfection
- Place the pie in the preheated oven
- Position on the center rack for even heat distribution
- Bake for 60 minutes, watching for a golden-brown top
- The pie will seem wobbly when first removed—this is normal!
- Allow to cool and set for at least 2 hours
- Professional Technique: Place a baking sheet underneath to catch potential overflow
Nutritional Information and Dietary Considerations
Comprehensive Nutritional Breakdown
| Nutrient | Amount per Slice | % Daily Value |
|---|---|---|
| Calories | 280 | 14% |
| Total Fat | 12g | 15% |
| Saturated Fat | 6g | 30% |
| Carbohydrates | 42g | 15% |
| Protein | 2g | 4% |
| Sugar | 28g | 56% |
| Sodium | 75mg | 3% |
| Calcium | 20mg | 2% |
| Iron | 0.5mg | 3% |
Health Perspectives
While delicious, this pie is a treat to be enjoyed in moderation. The high sugar content means it’s best consumed as an occasional dessert rather than a daily staple.
Healthier Alternatives and Modifications
Low-Sugar Transformation
- Replace granulated sugar with monk fruit sweetener
- Reduce total sugar content by 30%
- Maintain identical measurements, substituting sweetener 1:1
- Result: A lighter, less calorie-dense dessert
Gluten-Conscious Approach
- Substitute all-purpose flour with almond flour
- Adds a subtle nutty undertone
- Reduces overall carbohydrate content
- Provides additional protein and healthy fats
Diabetic-Friendly Adaptation
- Use a sugar substitute like erythritol
- Choose a whole wheat or almond flour crust
- Add cinnamon, which can help regulate blood sugar
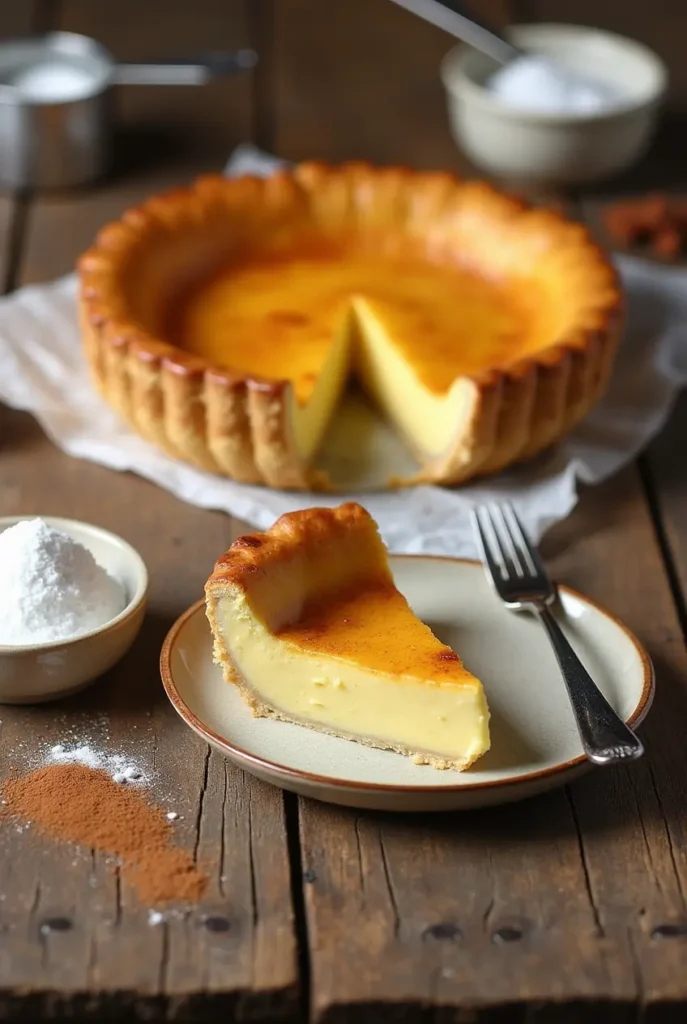
Serving Suggestions: Elevating the Experience
Presentation Ideas
- Serve chilled or at room temperature
- Dust with ground cinnamon or powdered sugar
- Pair with a scoop of vanilla bean ice cream
- Garnish with fresh mint leaves
- Ideal for picnics, potlucks, and unexpected dessert moments
Complementary Pairings
- Vanilla Bean Ice Cream
- Whipped Cream with Cinnamon
- Fresh Berries
- Caramel Drizzle
- Toasted Almond Slivers
Common Mistakes to Avoid
- Filling Preparation Pitfalls
- Avoid overmixing, which can create a grainy texture
- Mix ingredients just until combined
- Use room temperature water for smoother integration
- Baking Temperature Challenges
- Invest in an oven thermometer for precise temperature control
- Fluctuations can cause uneven baking or texture issues
- Calibrate your oven annually for consistent results
- Cooling and Cutting Techniques
- Allow pie to cool completely before slicing
- Use a sharp, clean knife
- Wipe the blade between cuts for perfect slices
- Premature cutting results in a runny, unstable filling
Storing and Preservation Tips
Short-Term Storage
- Refrigerate in an airtight container
- Best consumed within 3-4 days
- Cover with plastic wrap to prevent moisture absorption
- Store at consistent 40°F (4°C)
Long-Term Preservation
- Can be frozen for up to 2 weeks
- Wrap tightly in multiple layers of plastic wrap
- Thaw in refrigerator overnight
- Best to consume within 24 hours of thawing
Conclusion: More Than Just a Pie
The water pie recipe transcends mere dessert—it’s a culinary time machine that transports you to an era of ingenious cooking. By transforming water into a creamy, caramelized treat, you’re not just baking a pie; you’re preserving a piece of gastronomic history that speaks to human creativity, resilience, and the magic of simple ingredients.
Frequently Asked Questions
Q: Is water pie really made from just water? A: While water is the primary liquid, other ingredients like sugar, flour, and butter create a complex, custard-like consistency.
Q: How does water transform into a pie? A: The chemical interaction between flour, sugar, butter, and heat creates a magical transformation during baking.
Q: Can people with dietary restrictions enjoy this pie? A: Absolutely! We’ve provided multiple adaptations for gluten-free, vegan, and low-sugar diets.
Q: What makes water pie historically significant? A: It represents the incredible resourcefulness of settlers and home cooks during times of scarcity.
Ready to embark on this culinary adventure? Try the water pie recipe today, share your results in the comments, and don’t forget to subscribe for more unique, history-inspired recipes that celebrate the art of cooking!
Did You Try Our Recipe?
There are no reviews yet. Be the first one to write one.


