Best 5 Tips for a Perfect Gluten Free Chocolate Cake Recipe Every Time
Table of Contents
Introduction: Gluten free chocolate cake recipe
Imagine this: Two cakes sit on the counter, both claiming to be gluten-free chocolate masterpieces. But when you take a bite, one is dense and dry, while the other melts in your mouth with a rich cocoa flavor. Why does that happen? Is it magic or just a few simple tricks that separate an okay cake from a truly amazing one? Let’s dive into what makes the best gluten free chocolate cake recipe stand out—and how you can achieve perfection every single time.
Overview: What Makes This Recipe Special?
This isn’t just any gluten free chocolate cake recipe; it’s designed to deliver bakery-quality results right at home. With its rich cocoa flavor, moist crumb, and easy preparation, this dessert will impress even those who don’t follow a gluten-free diet. The entire process takes about 1 hour, including prep and baking time, making it perfect for last-minute gatherings or special occasions. Don’t worry—it’s also beginner-friendly! Even if you’re new to baking, these tips will guide you step by step toward success.
Essential Ingredients: Building Blocks of Success

To create a delicious gluten free chocolate cake, start with the right ingredients. Here’s what you’ll need:
- Gluten-Free Flour: A high-quality gluten-free all-purpose flour blend is crucial because it mimics the texture of traditional wheat flour. Some recipes call for xanthan gum to help bind the ingredients together, especially if your flour doesn’t already include it 2.
- Cocoa Powder: Use unsweetened cocoa powder for deep chocolate flavor without added sugar. Dutch-processed cocoa can enhance richness, but natural cocoa works well, too.
- Baking Soda & Baking Powder: These leavening agents help the cake rise properly. Make sure they’re fresh for optimal performance.
- Sugar: Granulated white sugar is commonly used, but brown sugar adds moisture and a caramel note. For a healthier option, consider coconut sugar or stevia blends.
- Oil or Butter: Vegetable oil keeps the cake moist, but melted butter can add extra flavor. If you prefer dairy-free options, stick with oil.
- Eggs: They provide structure and richness. If you’re vegan, try flaxseed meal mixed with water as an egg substitute.
Substitutions and Variations:
If you want to tweak the recipe, here are some ideas:
- Replace milk with almond, oat, or coconut milk for a dairy-free version.
- Add mix-ins like chopped nuts, chocolate chips, or fruit preserves for added texture and taste.
Step-by-Step Instructions: Your Path to Perfection
Now let’s walk through the steps to bake the perfect gluten free chocolate cake:
- Preheat Your Oven: Set your oven to 350°F (175°C). Grease and line two 8-inch round pans with parchment paper.
- Mix Dry Ingredients: In a large bowl, whisk together gluten-free flour, cocoa powder, baking soda, baking powder, salt, and xanthan gum (if not included in your flour blend) 4.
- Combine Wet Ingredients: In another bowl, beat eggs, sugar, vegetable oil, and vanilla extract until smooth. Gradually pour this mixture into the dry ingredients, stirring gently until combined.
- Add Liquid: Pour in milk and mix until the batter is uniform and free of lumps. Be careful not to overmix, which can lead to a tough cake.
- Pour Batter Into Pans: Divide the batter evenly between the prepared pans. Tap them lightly on the counter to release air bubbles.
- Bake: Place the pans in the preheated oven and bake for 25–30 minutes or until a toothpick inserted into the center comes out clean.
- Cool Completely: Allow the cakes to cool in the pans for 10 minutes before transferring them to a wire rack. Cooling ensures the layers are set properly and prevent crumbling during assembly 8.
Assembly: Putting It All Together
Once your cakes are cooled, it’s time to assemble the masterpiece:
- Level the Layers: Use a serrated knife to trim off the domed tops of the cakes to create flat surfaces. This helps the layers stack neatly.
- Apply Filling: Spread frosting or ganache generously between the layers. Press down gently to secure them.
- Crumb Coat: Apply a thin layer of frosting around the outside of the cake to trap crumbs. Chill for 15 minutes to set.
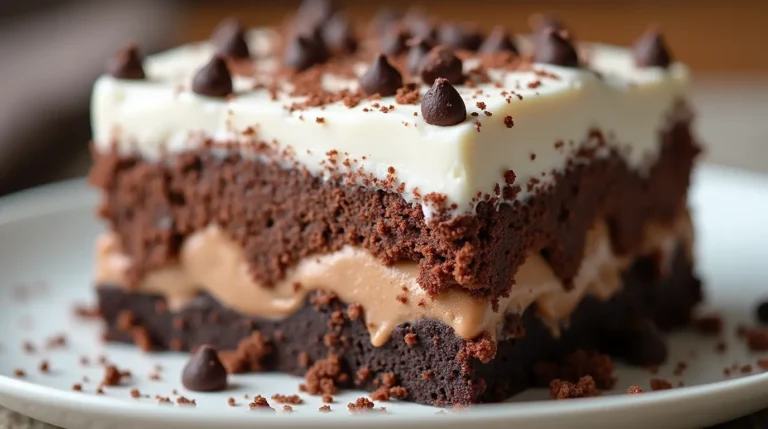
- Final Frosting: Once the crumb coat has set, frost the entire cake with your desired amount of icing. Decorate with sprinkles, fresh berries, or shaved chocolate for flair.
Tip: Keep decorations simple yet elegant to let the rich chocolate flavors shine!
Storage and Make-Ahead Tips: Keeping Freshness Intact
Your gluten free chocolate cake can stay fresh for several days if stored correctly:
- Room Temperature: Store the frosted cake in an airtight container at room temperature for up to 3 days.
- Refrigeration: For longer storage, refrigerate the cake, wrapped tightly in plastic wrap. Bring it back to room temperature before serving.
- Freezing: To freeze, wrap individual slices in plastic wrap followed by foil. Frozen cake keeps for up to 3 months. Thaw it overnight in the fridge.
When reheating, microwave briefly or leave at room temperature for softer texture.
Recipe Variations: Get Creative!
Here are some fun ways to switch things up:
- Spiced Chocolate Cake: Add ground cinnamon, nutmeg, or chili powder for a warm spice kick.
- Orange Zest Twist: Incorporate finely grated orange zest into the batter for a citrusy brightness.
- Nutty Delight: Fold in toasted hazelnuts or pecans for crunch and depth.
- Raspberry Surprise: Layer fresh raspberries or raspberry jam between the cake layers for a fruity contrast.
Experiment with different flavors and textures to make the recipe uniquely yours!
Conclusion: Enjoy the Journey
Making a gluten free chocolate cake doesn’t have to be intimidating. By following these five tips—using quality ingredients, proper mixing techniques, cooling adequately, assembling carefully, and storing wisely—you’ll consistently produce show-stopping desserts. So go ahead, roll up your sleeves, and enjoy creating something sweet and meaningful. Remember, practice makes perfect, so keep experimenting and having fun!
FAQs: Answers to Common Questions
Q: Can I use almond flour instead of gluten-free flour? A: While almond flour can work in certain recipes, it tends to produce denser results. Stick with a gluten-free all-purpose blend unless substituting carefully tested ratios.
Q: Are there health benefits to eating gluten-free chocolate cake? A: Yes, avoiding gluten can aid digestion for those with sensitivities. Plus, using whole-food sweeteners and oils boosts nutritional value.
Q: How do I fix a cracked cake top? A: Cracking often happens due to overbaking or uneven heat distribution. Ensure accurate oven temperature and avoid opening the door frequently during baking.
Happy baking, and remember—the best part is always enjoying the fruits of your labor!
Did You Try Our Recipe?
There are no reviews yet. Be the first one to write one.


